3 Simple Summer Up-dos
beautySummer. Is. Here! We love the warm weather and you’ll never catch us complaining about a little humidity, but that said, sometimes when temps rise your hair needs to go up as well. With that in mind, we snapped some photos of three of our favourite simple up-dos that will get your hair off of your neck and out of your face – but won’t make you feel like you’re in middle school, or headed to the gym.
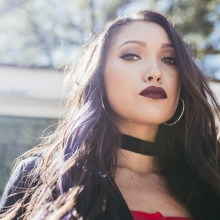
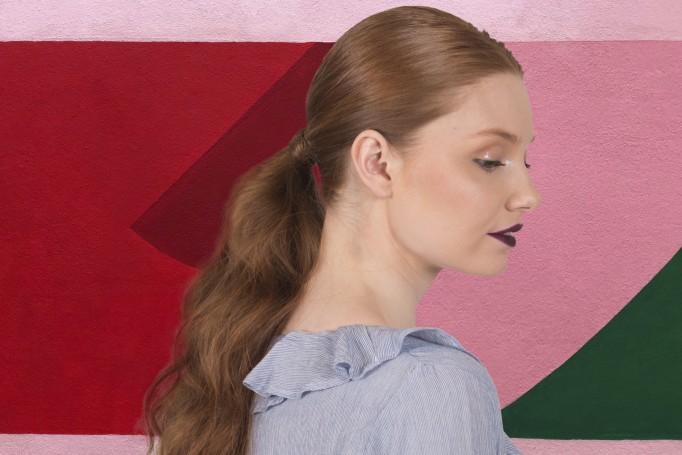
Style 1: The Teased Low Ponytail
Difficulty Level: Novice
This style is a simple twist on a basic ponytail that’s easy to pull off if you’re a little intimidated by braids, but not so basic that it feels more suited to running in the park than drinks on the patio. Inspired by one of our favourite beauty trendsetters, Zendaya, the key to nailing this look is in the details.
First off, the contrast between the sleek crown and voluminous ponytail is what makes this look pop. If your hair is naturally super straight, curling the ends first will help to add volume. Then, part your hair in the centre and slick it back into a tight, low ponytail. Using a smoothing serum will help to smooth out any flyaways and add shine.
Next, using hairspray and a comb, tease your ponytail to create lots of volume – you want to be able to see the ponytail when looking straight-on into the mirror! For the final touch, take a small piece of hair from the underside of your ponytail and wrap it around the hair elastic, pinning it in place.
With bold makeup choices like a vampy lip and wet-look eyeshadow, this simple style could take you down the red carpet at your latest movie premier.
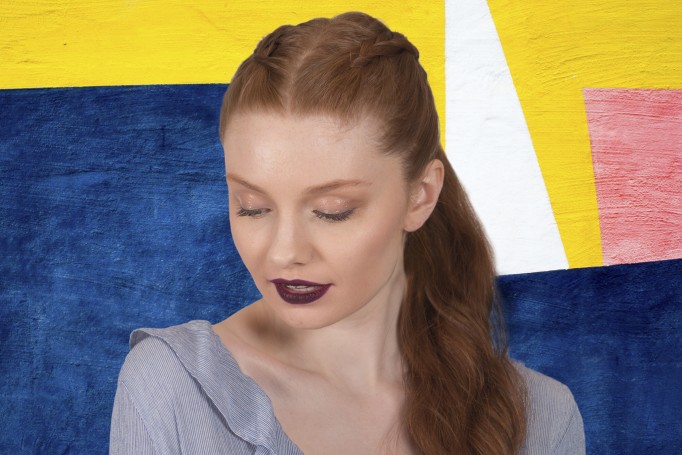
Style 2: The Double French Braids Ponytail
Difficulty Level: Intermediate
We’re moving into French braid territory here, but these smaller braids are a great chance to learn if you haven’t yet mastered the style. Notice that we opted for an inside-out French braid – you can get a closer look at how to do that right here.
Part your hair in the centre and braid back one side, securing with an elastic when you’ve reached the back of your head, then do the same thing on the other side.
When both braids are done, remove the elastic from the first braid and pull both braids and the rest of your hair into a mid-height ponytail, right in the centre of your head. Do the same wrap technique around the elastic as mentioned for the look above, and finish with a little hairspray to keep everything in place.
This style is a great option for those hot summer days when blowdrying your hair seems outrageous. Just let your hair air-dry completely or until it is just slightly damp, and then style.
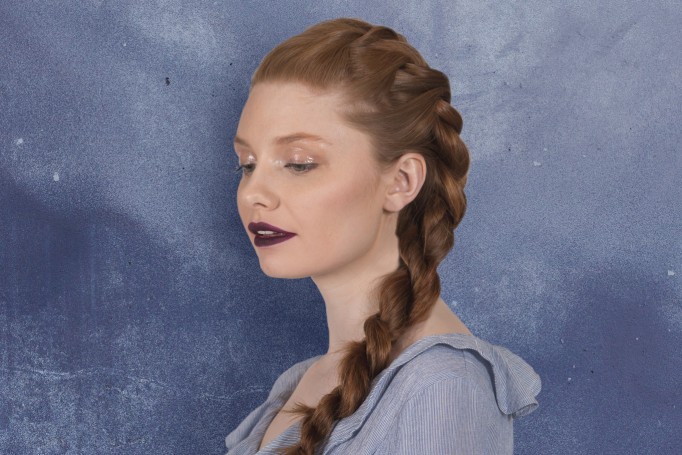
Style 3: The Rope Braid
Difficulty Level: Requires some practice – but totally doable
Don’t be intimidated by this style; it’s going to require some patience and probably a little practice to get it where you want it, but we promise it’s not as tough as it looks!
This style is perfect for second day hair (or third day, we’re not judging) that you’ve freshened up with dry shampoo, which will help to add some grip, hold, and volume. Get a look at dry shampoo technique here, and don’t be afraid to go a little heavier than normal with the dry shampoo prior to trying this braid so that you have lots of thickness. After adding your dry shampoo, be sure to run your fingers through your hair at the crown, lifting and creating volume.
Start with a pretty deep side part on the side opposite to where you want your braid to run. Section off a small strip of hair along the part, split it in half, and pull the front half across and over the back half. Now that back half is in front, and you’ll pull another small piece of loose hair to join that section, then loop it again over top of the second section of hair. Keep traveling down your hairline, adding hair to the front piece as you go and looping the two pieces together like a rope. As you move closer to your shoulders you’ll want to start grabbing larger chunks of hair and reaching farther to the back of your head so that your “rope” gets bigger. You want to be finished adding all of your hair to the braid by the time you reach your shoulders. Again, this might take a little practice but it’s quick to do, so shake it out and start over a few times until you get the hang of it!
Once you reach your shoulders, all of your hair should be in two sections. Twist the two sections individually counter-clockwise as tightly as you can, then rope the two twisted pieces together clockwise, continuing down to the ends of your hair. Secure with an elastic.
The last step is the secret weapon to this look (and many other braided styles). Add volume by using both hands to going back over your braid, gently tugging on the sections of hair to loosen the braid and make it appear very thick. Start gently and continue pulling until you have a width and thickness you like. You can see us doing this in the half-crown braid tutorial here.
To keep your hair in top shape, check out these great products for protecting and healing hair. Get some great tips to achieving flawless skin here. And for more summer beauty inspo, check out these 8 must-have summer beauty products for your skin and hair.
See something that caught your eye? Visit St. Vital Centre to shop the looks featured in this post (check stores for availability):
Blue ruffle top: American Eagle Outfitters, $44.95